Bread, Baby! [Homemade White Bread]
- Alesha Manning

- Feb 1, 2021
- 3 min read

I think everyone-- well, most everyone, made bread during the start of this pandemic. I AM ONE OF THOSE! At first it was so hard to find yeast because the trend was so great, but soon things calmed down and those that hated it dropped off and those that loved it are probably now opening bread shops around the globe. I'm not opening a bread shop, but I do LOVE making a nice loaf of fresh bread. It's one of those things that can lift your spirits and, of course, make your home smell AHHH-MAZING!! There are a ton of recipes out in the universe with all types of ways to make a loaf of bread, but I think this one is easy enough for even the most timid of cooks.
And I have to say, the girls love it more than any grain bread from the store. Now that's saying a lot. Bread takes time, which means- if you don't have the patience for dough rising (twice), then definitely choose to make this on a rainy day. You won't be disappointed!
Here's the recipe. See? Even looking at the ingredients you're thinking "I can do this!"... and you can.
2 1/2 t active dry yeast
6 T water, plus 1 1/3 cup water, warm and divided
2 T sugar to activate the yeast
1/2 T coarse salt
2 T butter, softened
About 5 cups of flour
You'll need a loaf pan and that patience I mentioned earlier.
Part 1--Mix & Sit
In a stand mixer with the dough attachment ,put your yeast and warm (hot, but not too hot) water in the mixer. Top with sugar and mix a little with a fork and let sit for about 5 minutes. After 5 minutes you should see your yeast has fallen for the sugar and is now bubbly and flowered, so to speak. If nothing has changed- start over. it could be that your yeast has expired or the water was too hot. Either way, if you don't see that the yeast has "activated"- just start over.
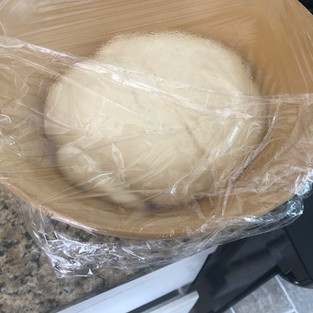
If you've got something going, then turn your mixer on low and add about 2 cups of flour, your salt and butter then SLOWLY add the water. If you don't do this part slowly you'll have water all over the place. I like to kinda wait at this point for all of this to come together before adding more flour. When it does, then begin to add more flour 1/2 cup at a time until the dough comes together and pulls away from the side of the bowl. And just be patient here- it will happen. Once you can run a few turns with the dough off the side of the bowl, you can take it from the bowl and place in another large lightly oiled bowl. Make sure the bowl you move the dough to is large enough for the dough to rise and that there is enough olive oil in the bowl that it doesn't stick. Ultimately, oil up the full sides of the bowl. Place the bowl in a warm, dry place and let rise for about 1 hour. I like to put mine in an unheated oven with the oven light on. No draft. Warm enough. Dry.
After the rise, punch down the dough. Yes, take your rings off and lightly punch/press the dough in the bowl. It will deflate and be manageable. On a floured surface, very gently pat the dough to about a 10x10 rectangle. Rolling the dough will remove all that wonderful air and give you a pretty dense loaf. Roll the rectangle into a like tootsie roll and pinch off the ends and place into a greased loaf pan. Place the loaf back in the oven (STILL OFF) and allow for the 2nd rise. This rise should be only about 30-45 minutes. You'll see the loaf looking all pretty. When done rising, brush with some melted butter. Remove from the oven. Preheat the oven to 400 degrees and bake loaf for about an hour to 1.15 minutes.
Allow to cool completely. Slice. Toast. Eat. Love. Enjoy!!!
Bread & Butter Kisses,
Soultree


Comments